#01 - Windows Server IaC With Machine Configuration
Windows Servers configured with code
Introduction
Building Windows Servers using code is not something we’ve traditionally seen very often. However, as the future of infrastructure continues to shift towards Infrastructure as Code, it’s time to rethink how we manage our beloved Windows Servers.
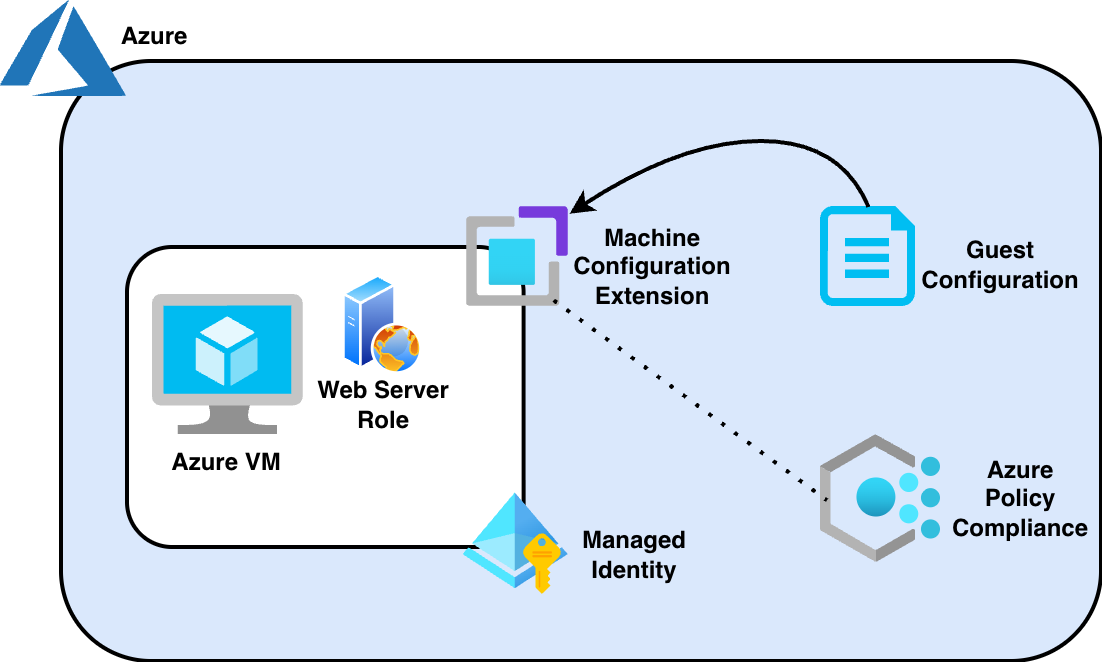
With Microsoft’s strong push towards hybrid capabilities through Azure Arc, we can now bring many cloud-native features to on‑premises environments. One of those features is Machine Configuration. Jumping straight into Machine Configuration without understanding how it works, how it can be used, or how to automate deployments using DevOps pipelines can be challenging for many organizations.
At it’s core, Machine Configuration is Desired State Configuration (DSC) under the hood — similar in concept to what Ansible provides for Linux. The key idea is simple, we define the desired configuration of our servers as code and let the platform ensure that state is maintained.
So why hasn’t this been widely adopted before? The technology has existed for a long time, but it never truly gained traction in the community. Traditional DSC relied on push and pull configuration models, each with their own advantages and limitations. What’s different now is that Machine Configuration allows us to build modular packages and assign them to servers. Multiple configuration packages can be applied to a single server — something that wasn’t possible before, when entire server configurations were bundled into a single DSC package.
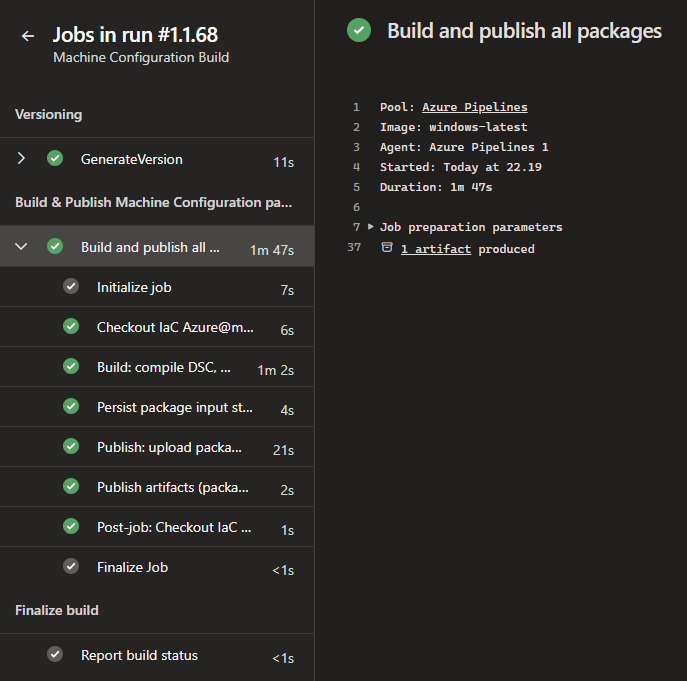
That said, building, compiling, and publishing these packages can still be time-consuming without proper automation. So why not leverage DevOps pipelines to handle this efficiently and consistently?
In this first part will look at how to manually create, compile, and assign a simple package to a Windows Server just to get the fundamentals in place.
Prerequisites
For this demo, we’ll need the following components in place:
- DSC PowerShell modules
- GuestConfiguration PowerShell module
- Azure Storage Account (used to store the Machine Configuration packages)
- Azure Arc–connected Windows Server
The first PowerShell modules are required to build, compile, and package the configuration. The Storage Account is used as a distribution point for the compiled packages, and Azure Arc enables us to assign and enforce Machine Configuration on non‑Azure machines.
Let’s get into the configuration and building our new package!
Building Package
The first step is to define a configuration that expresses the desired state of the machine. In this example, we’ll keep things simple and focus on installing a Windows feature for IIS using the “classic” DSC 2.0 modules.
Create the following as a PowerShell script:
1
2
3
4
5
6
7
8
9
10
11
12
13
14
15
16
17
18
19
20
21
22
23
24
25
26
27
28
29
30
31
32
33
Configuration windowsFeature-iis {
    Import-DscResource -ModuleName 'PSDscResources'
    Node 'localhost' {
        WindowsFeatureSet windowsFeature-iisS {
            Name                 = @(
                'Web-Server'
                'Web-Common-Http'
                'Web-Default-Doc'
                'Web-Dir-Browsing'
                'Web-Http-Errors'
                'Web-Static-Content'
                'Web-Health'
                'Web-Http-Logging'
                'Web-Log-Libraries'
                'Web-Request-Monitor'
                'Web-Performance'
                'Web-Stat-Compression'
                'Web-Security'
                'Web-Filtering'
                'Web-App-Dev'
                'Web-Net-Ext45'
                'Web-Asp-Net45'
                'Web-ISAPI-Ext'
                'Web-ISAPI-Filter'
                'Web-Mgmt-Tools'
                'Web-Mgmt-Console'
            )
            Ensure               = 'Present'
            IncludeAllSubFeature = $true
            LogPath              = 'C:\DSC-Logs\windowsFeature-iis.log'
        }
    }
}
In order to run the configuration, we need to dot source our FILENAME.ps1 script into the current scope. After that we can run the following to build the .mof file:
1
windowsFeatureIIS -OutputPath "C:\DSC-windowsFeatureIIS"
Note, to compile the package we call for the configuration name inside the DSC file.
With the configuration defined, step one is now complete.
Compile Package
At this point, we’ve compiled the DSC configuration and produced a localhost.mof file. This MOF file represents the desired state of the machine — specifically, that IIS should be installed — and it serves as the input when we build a Machine Configuration package. Nothing has been assigned or enforced yet, we’ve simply translated our DSC definition into a format that Machine Configuration can consume.
In this next step, we’ll take this localhost.mof file and use it to compile a new Machine Configuration package that can be published and later assigned to our Azure Arc–connected server.
Run the following in PowerShell inside the folder containing the localhost.mof:
1
2
3
4
5
6
New-GuestConfigurationPackage `
    -Name 'windowsFeatureIIS' `
    -Configuration './localhost.mof' `
    -Path 'package' `
    -Type AuditAndSet `
    -Force
Once the compilation is complete, the output will be a .zip machine configuration package. Before we can use this package on our servers, we need to fetch the file hash. This ensures the package integrity and guarantees that the content hasn’t been modified between creation and assignment. Use the following PowerShell command to generate a SHA-256 hash of the package:
1
Get-FileHash -Path 'package\windowsFeatureIIS.zip' -Algorithm SHA256
This command returns the hash that is unique for content of the package. Save this as we’ll need it when assigning the package.
Upload and Assign Package
The next step is to upload the compiled .zip machine configuration package to a storage account. This storage account acts as the central location from which servers will download the package. At this stage, the package should already be finalized, as described in the previous steps. Once uploaded, the package should be treated as immutable — any change to the file would invalidate the hash.
Once the package has been uploaded to the storage account, we need to generate a Shared Access Signature (SAS) token and URL. This SAS token will be used by the servers to access and download the machine configuration package. There are some important aspects to consider:
- Scope it as narrowly as possible Only grant read access to the specific blob that contains the package.
- Set an appropriate expiry time The token shouldn’t be valid indefinitely.
- Avoid account-level or container SAS Blob-level SAS tokens are preferred for tighter security control.
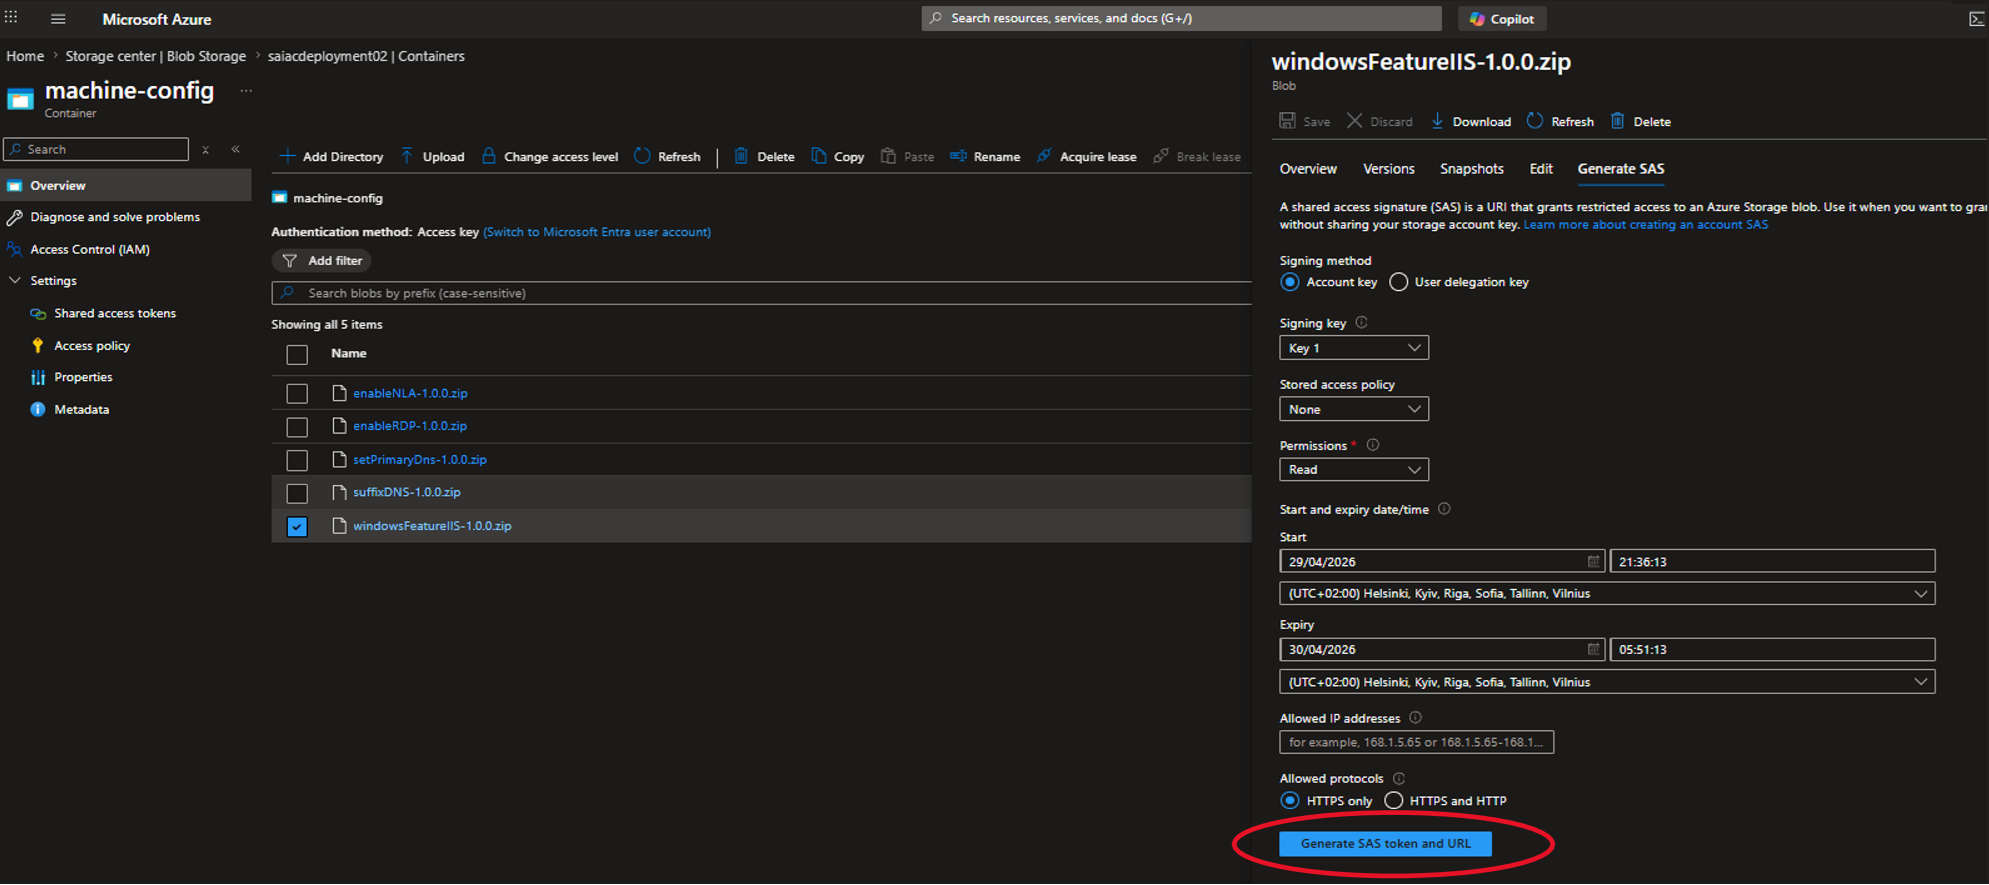 How to generate SAS token for the package
Finally, we have everything in place to start the assignment of our newly created package to our Arc-Enabled Server. Now it’s time to use the URL and HASH that we’ve previously generated:
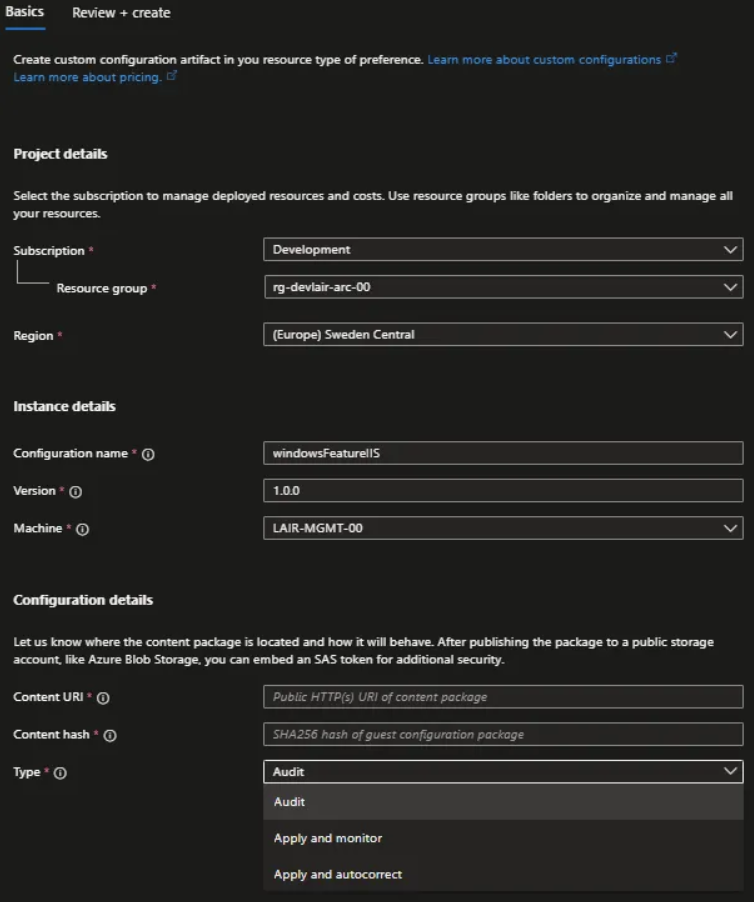 Package assignment
When assigning the machine configuration package, you must choose how the configuration should be handled on the server. This is controlled by the package type. There are 3 options available to us:
Apply and monitor This option applies the package once and then continuously monitors it. Audit Audit works like any other audit scenario. Apply and autocorrec This options applies the package and evaluates every 15 minutes. If the resource is compliant, nothing happens. If the configuration has changed or drifted, it is automatically reverted back to the defined state.
Once you’ve assigned the package, it’s time be patient! The initial deployment can take a while as the agent applies required modules, downloads the package, applies the configuration, and reports compliance status back to Azure. Grab a coffee and give it some time before checking the results.
 Pending package assignment
And then finally!
 Compliant package assignment
So, what’s our options for automating the deployment of machine configuration packages? In my view, there are two approaches.
The first option is Azure Policy. Using Azure Policy to assign machine configurations at different scopes — management group, subscription, or resource group — is a great way to ensure a baseline configuration across all servers in our environment. This is the approach I’d recommend for organization‑wide standards where consistency and governance is key.
The second option is Bicep. With Bicep, we can define machine configuration package assignments explicitly for specific servers or workloads. This gives more granular control and fits when different server roles require different configurations. This approach also aligns with the goal of moving organizations toward a code‑based and version‑controlled infrastructure.
In practice, these two options work well together: Azure Policy for broad baselines, and Bicep for specific configurations. I won’t go into what these templates look like in this post— that will be covered in later parts of this series.
Final Word
In this post we’ve walked through defining desired state with DSC, compiling and hashing the package, storing it and making it available for assignment. These steps makes up the foundation for using machine configuration. While it’s perfectly possible to perform these steps manually, the real value comes when this process is automated.
In the next part of this series, we’ll shift focus to automation and pipelines. We’ll look at how machine configuration packages can be built, versioned, and published through CI/CD pipelines, and how assignments can be done through code using Azure Policy and Bicep. This moves the entire workflow into a repeatable and code‑first model that fits perfect into todays shift towards infrastructure as code. That’s where machine configuration really starts to shine — when configuration, compliance, and governance become part of an automated delivery pipeline rather than a manual task.